^ Go up

So you have installed our real estate script.
What should you do at first? Add listings at once? Or create users? Or maybe you should add some additional fields for listings in the "Extended form editor"?
Don't jump the gun.
Before you launch and start developing your real estate website we would like to recommend you to fulfil some really important steps.
The main task of the counter is to gather traffic and attendance statistics (resources and request traffic) of your real estate website, page view statistics.
However, modern counters include a lot of other useful features – just have a look at Google Analytics features!
The сounter should be added in such a way to be available on all website pages available for users.
To do it you should in a file themes/theme_name/views/layouts/main.php add a code up to the line:
<div id="loading" style="display:none;"><?php echo Yii::t('common', 'Loading content...'); ?></div>
As a result it should look like this:
<script type="text/javascript">
var _gaq = _gaq || [];
_gaq.push(['_setAccount', 'XXXXXXX']);
_gaq.push(['_trackPageview']);

(function() {
var ga = document.createElement('script'); ga.type = 'text/javascript'; ga.async = true;
ga.src = ('https:' == document.location.protocol ? 'https://ssl' : 'http://www') + '.google-analytics.com/ga.js';
var s = document.getElementsByTagName('script')[0]; s.parentNode.insertBefore(ga, s);
})();
</script>
<div id="loading" style="display:none;"><?php echo Yii::t('common', 'Loading content...'); ?></div>
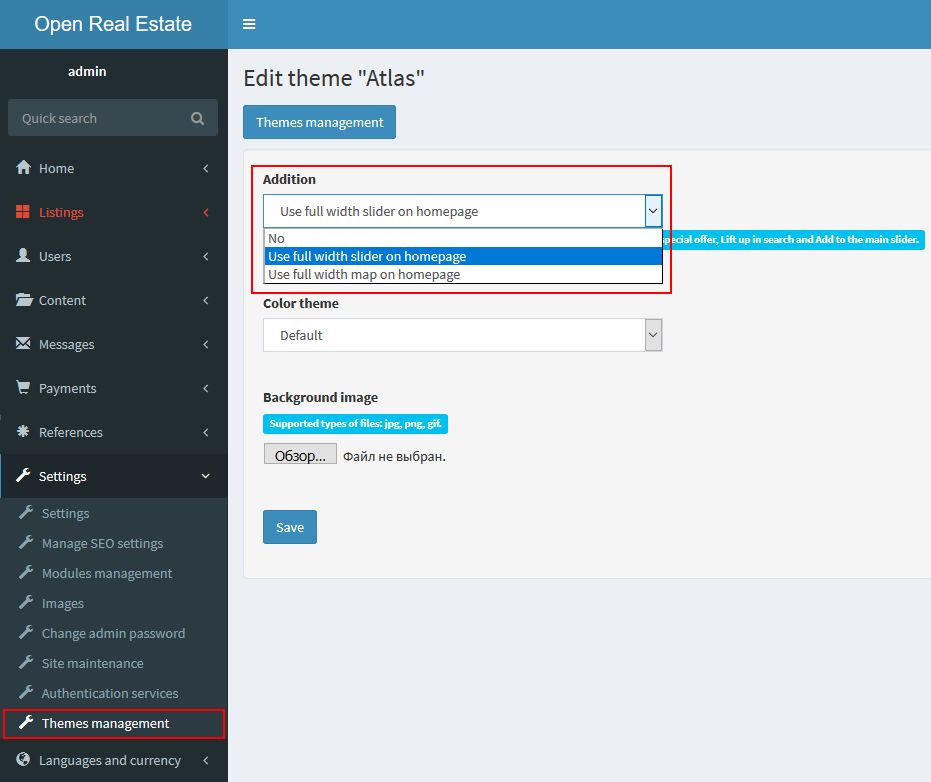
Theme "Atlas" now has got 5 ready-to-use colour solutions Default, Fresh, Bagway gradient, Green and Sandstone.
Choose colours that fit you best!

You can also choose homepage view. You can use a full-width slider on the homepage or full-width map on the homepage:
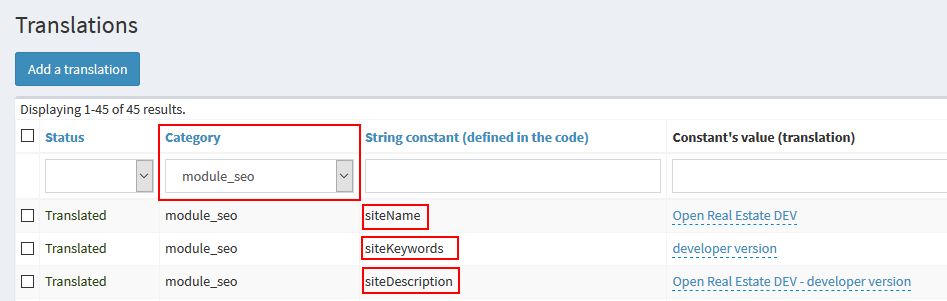
In our standard version, our logo consists of two parts: 'house image' and 'underscore line'.
It is made for our users to be able to change the website name and the underscore line to be under the whole site name.
You can change the site name in a section 'Translations', category 'module_seo':
If you have module "SEO", you can do the same: 'Settings' -> 'Manage SEO settings'. Choose tab 'Other Settings':

When you changed the site name you can see the following:
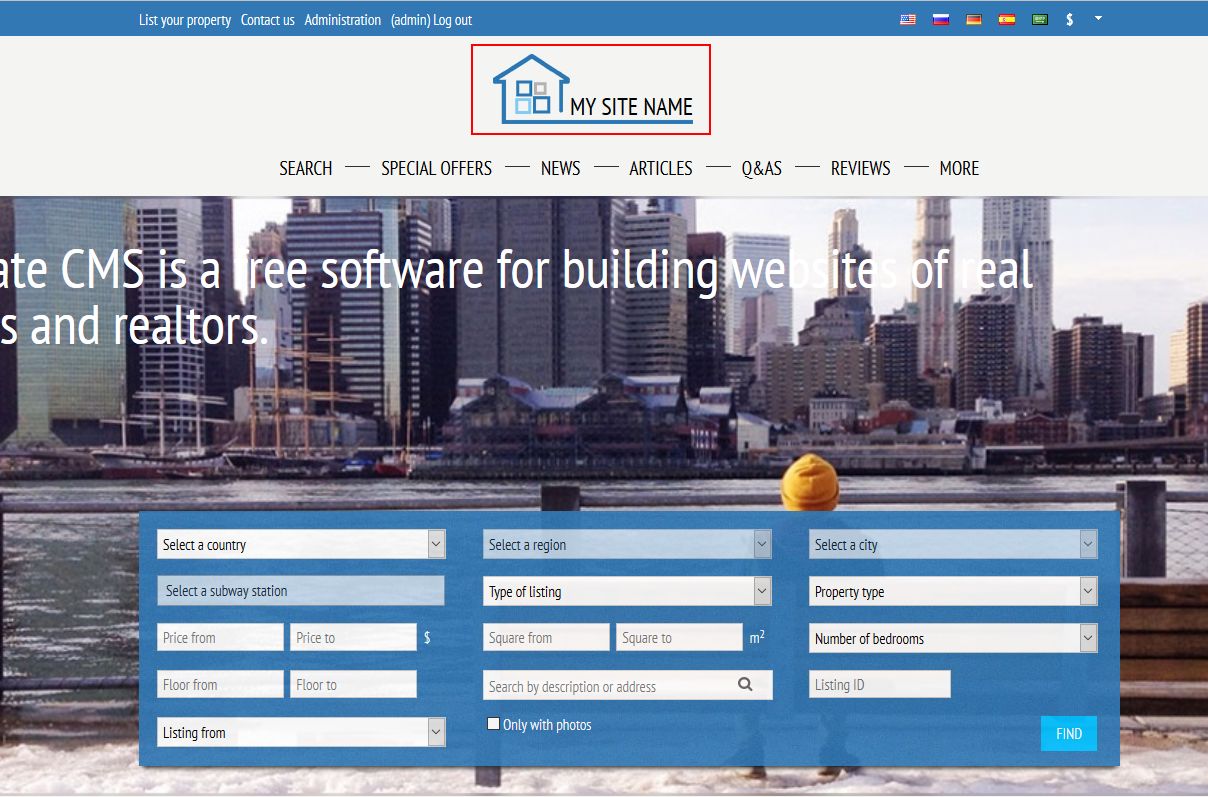
In case you want to change our logo you can do it easily.
Open file themes/theme_name/views/layouts/main.php, find code:
<div class="logo">
<a title="<?php echo Yii::t('common', 'Go to main page'); ?>" href="<?php echo Yii::app()->controller->createAbsoluteUrl('/'); ?>">
<div class="logo-img"> <img width="77" height="70" alt="" src="<?php echo Yii::app()->theme->baseUrl; ?>/images/pages/logo-open-ore.png" /></div>
<div class="logo-text"><?php echo CHtml::encode(Yii::app()->name);?></div>
</a>
</div>
If you don't need the site name, delete the line:
<div class="logo-text"><?php echo CHtml::encode(Yii::app()->name);?></div>
And instead:
<div class="logo-img"> <img width="77" height="70" alt="" src="<?php echo Yii::app()->theme->baseUrl; ?>/images/pages/logo-open-ore.png" /></div>
You can add your own image:
<img width="width_in_pixels" height="height_in_pixels" alt="" src="<?php echo Yii::app()->theme->baseUrl; ?>/images/pages/my-logo.png" />
In this case your image should be named my-logo.png and be situated in a folder themes/theme_name/images/pages/
Please, pay attention that instead of width_in_pixels and height_in_pixels you should add real picture size.
If you want the map to be centred correctly, you should change the default city name in settings:

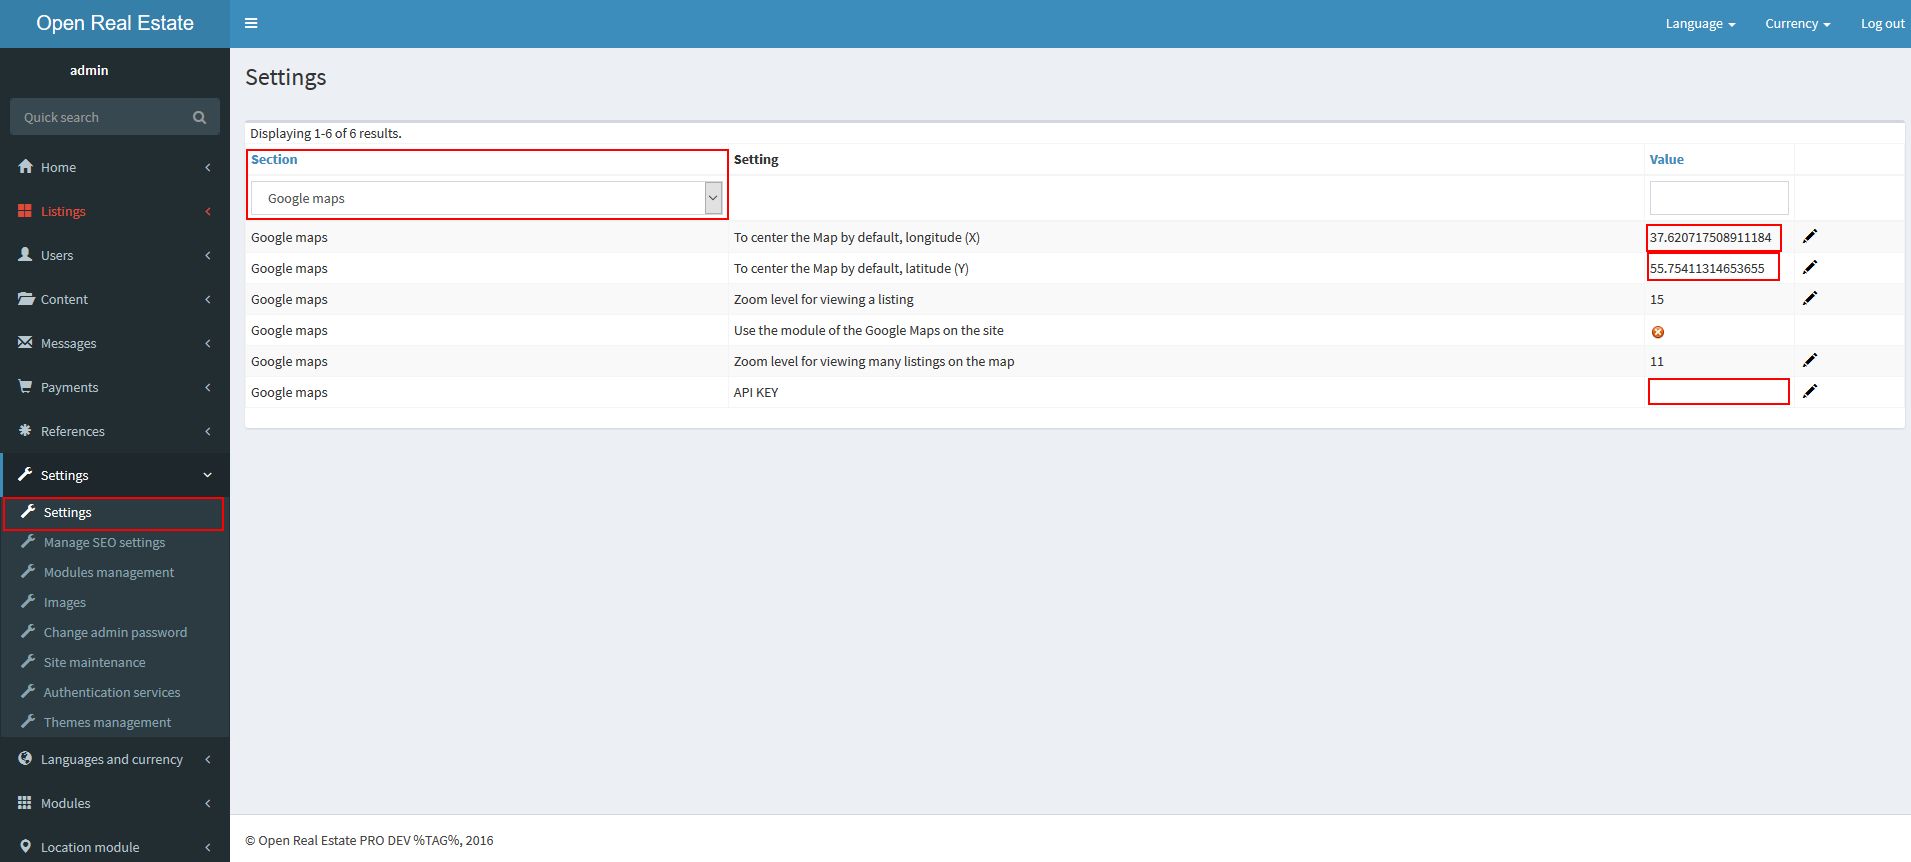
Do you want to have Google Maps on your website?
In 'Settings' a section 'Google Maps' from a dropdown list.
Set your city location coordinates.
Get API key for Google Maps: https://developers.google.com/maps/documentation/javascript/get-api-key and save the key you received in settings API KEY:
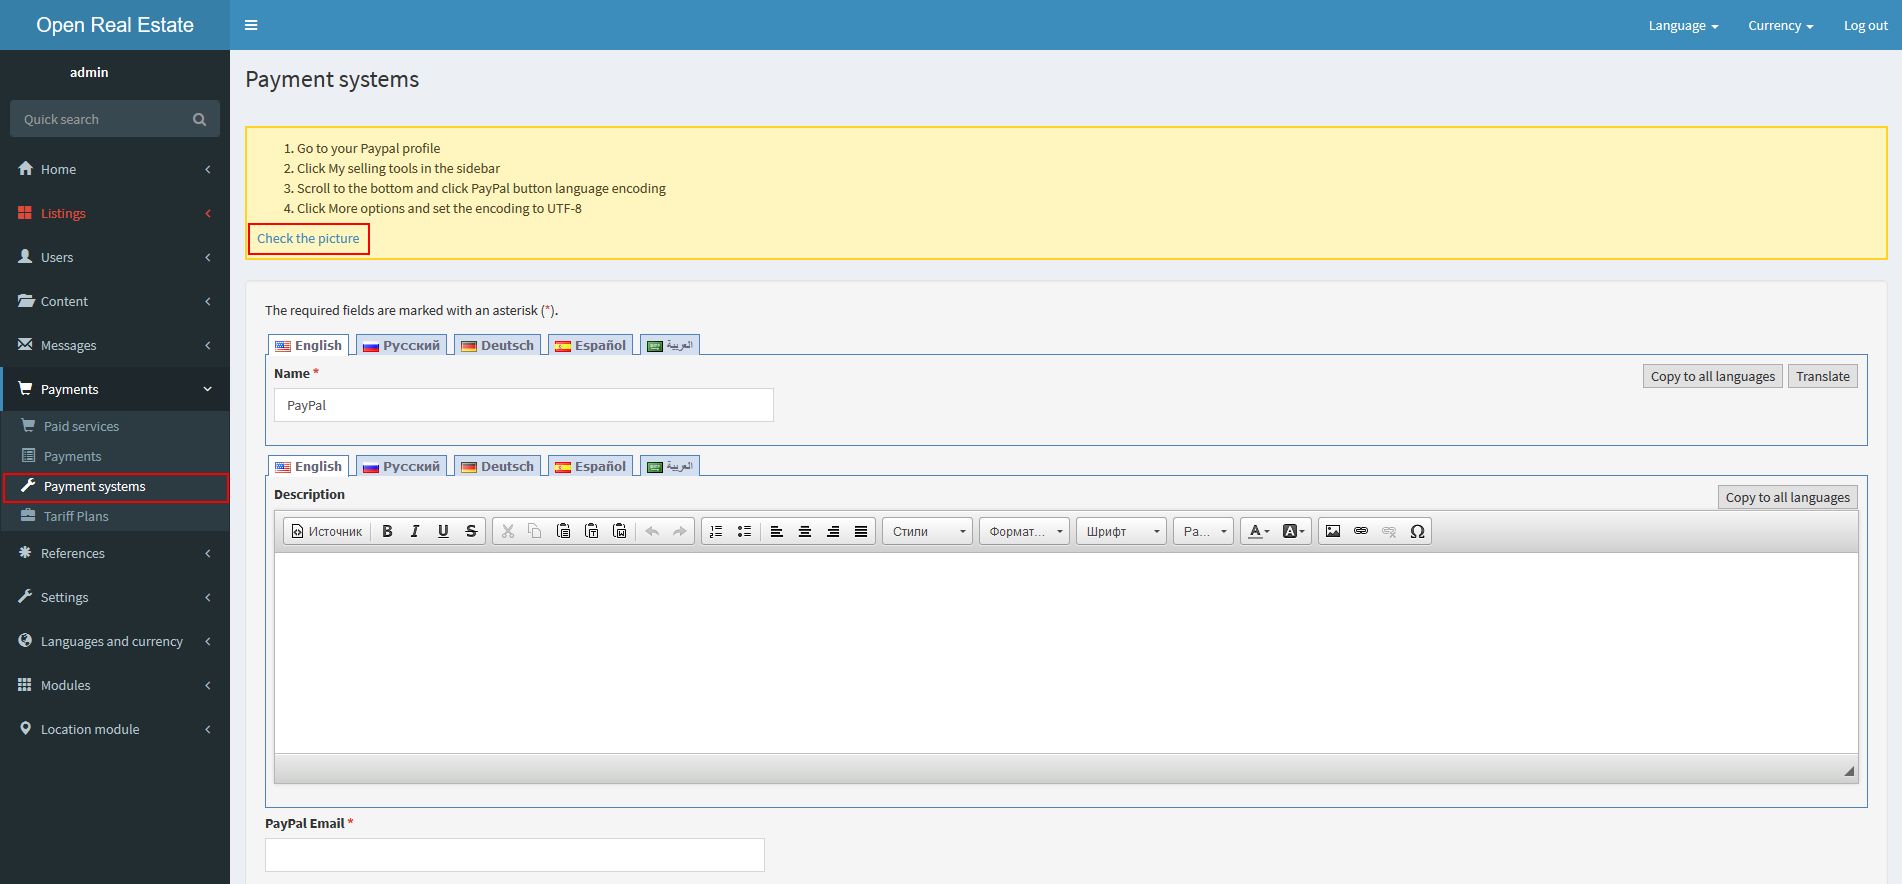
If you have a module 'Paid services and payments' you can raise some money on your website.
However, before you get the income you should at least set the data in payment services correctly.
Payment service PayPal you can set easily like putting two and two together: you should only enter your e-mail and set coding in your private account of the payment service system.
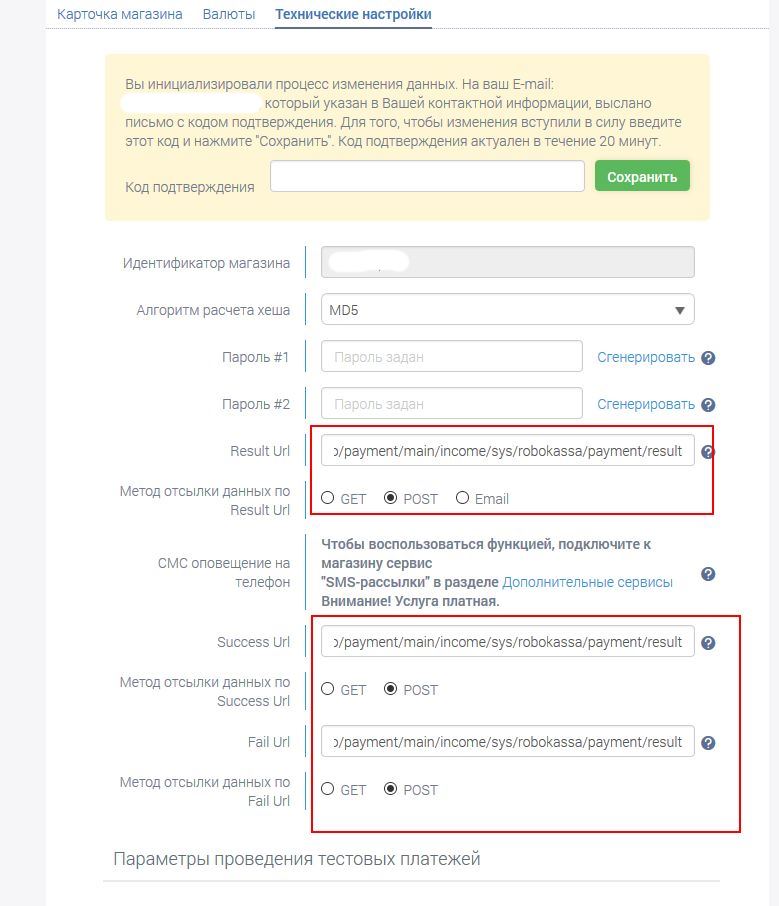
Robokassa settings are a little bit more complicated.
In your private account of the service choose the hash algorithm 'md5' choose ResultUrl, SuccessUrl and the same FailUrl as SuccessUrl in the administration panel of your real estate website.
Moreover, don't forget to add and save the data you received from Robokassa ('Login', 'Password1', 'Password2').

You can set watermarks in a section 'Settings' -> 'Images'.
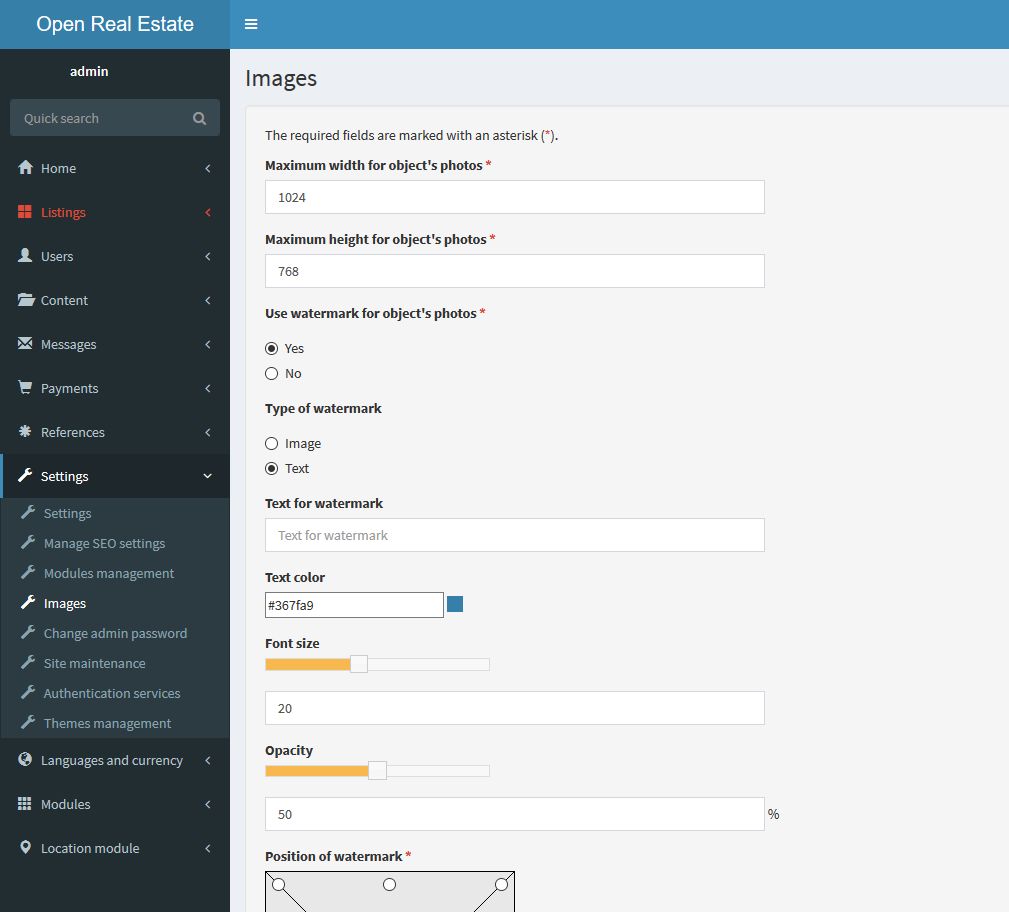
We tried to do our best for you set your watermark in a way you want it to be: there is an opportunity to upload an image as a watermark or to use a text.
If you use a text as a watermark, there is an opportunity to choose colour, transparency, text size.
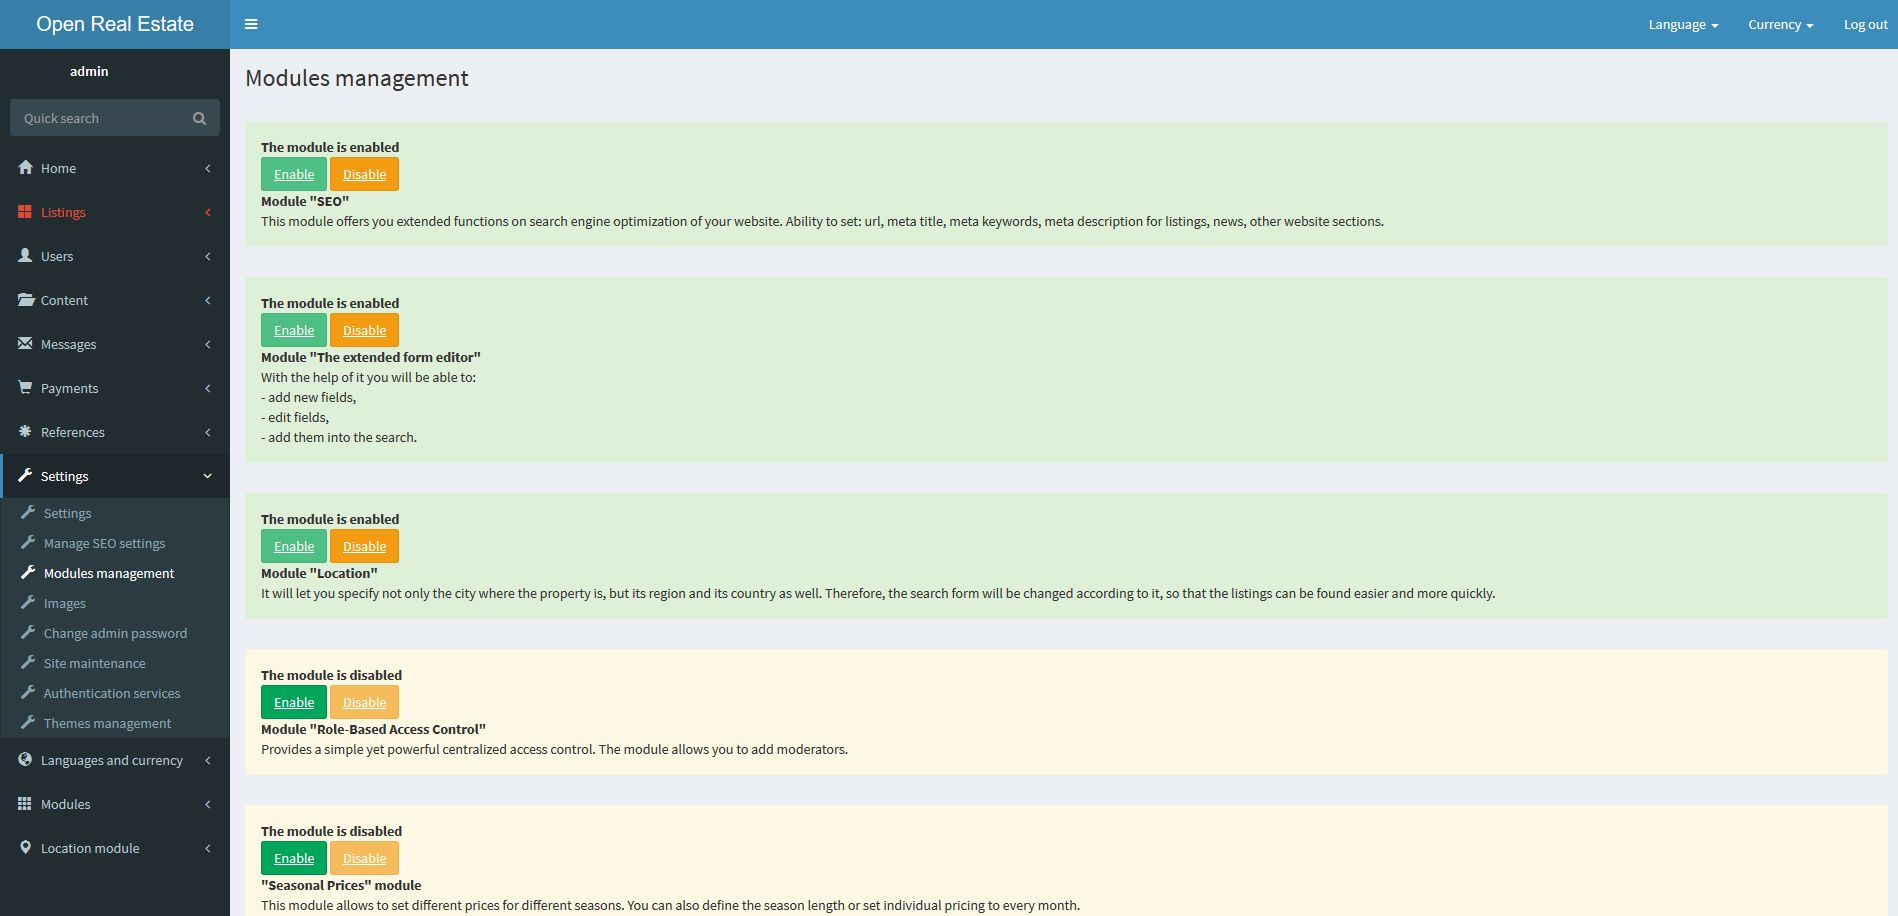
Our CMS has got a module architecture.
What advantages does it give you? For example, you don't need season prices for the listings type "Rent". In this case, you can just turn off the module 'Seasonal prices'.
Furthermore, we would like to recommend you to look through the section 'Settings' in the administration panel carefully. In this section, you can find a lot of interesting and useful information.
Do not forget to back up your site.

 English